


I love the start of fall! It always feels like a new beginning or rebirth of the seasons. In addition to the back-to-school schedules, sports, and crock pots that all tend to come alive at this time, it seems to come at just the right time when we all need a bit of change of scenery.
At the start of each fall, I have grand visions of kids’ fall crafts and activities we can do together to celebrate the change of seasons. Then reality sets in that while all of these fantastic fall crafts I see on Pinterest and Instagram look like a lot of fun for toddlers and young children, they also look pretty messy!
While I’d love to spend all day spray painting leaves and pine cones, the reality is that I don’t have all day to clean up the aftermath of said projects.
Here are a few fall toddler crafts my kids love that makes for an easy clean-up and won’t destroy the house.
Mess-Free Fall Cupcakes
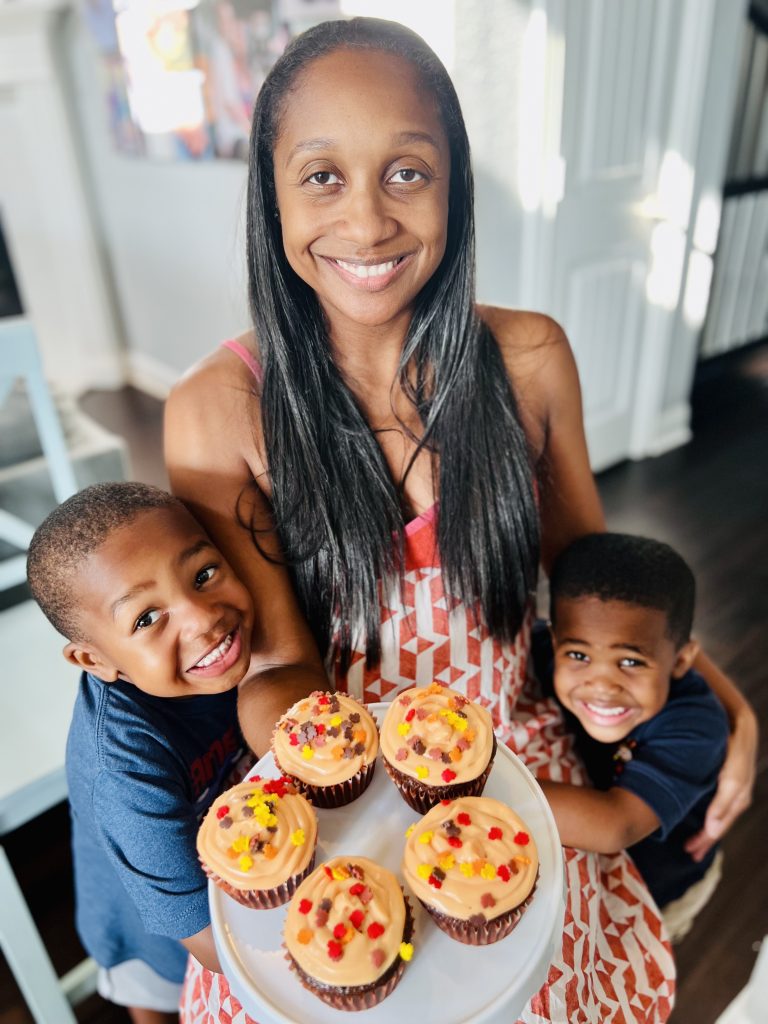
If your kids are like mine and they enjoy baking (or just licking the bowl), here’s a simple way to make fall cupcakes mess free.
What You’ll Need:
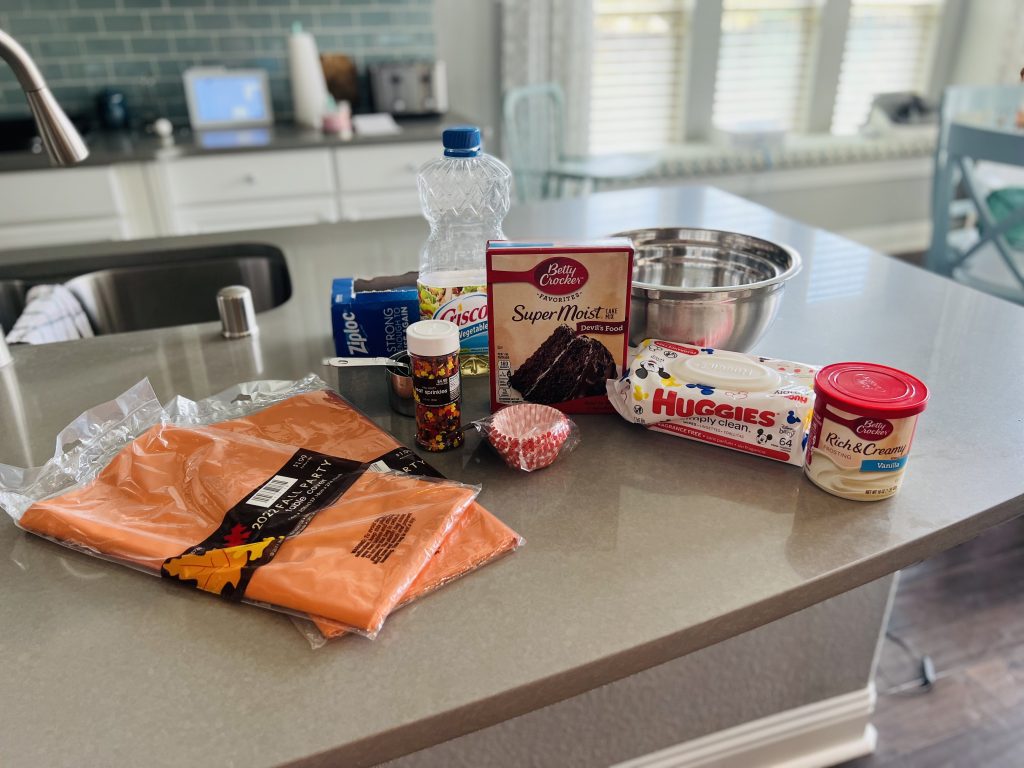
- Storage or quart-size freezer bags
- 1-2 disposable orange color or fall-themed rectangular tablecloths (you can get these Hobby Lobby or Dollar Tree for $1 each)
- Cake/cupcake mix: We use Betty Crocker Super Moist Devils Food Cake
- Fall-themed cupcake liners
- Leaf/fall sprinkles (LARGE sprinkles are key). I found these in the seasonal section at Hobby Lobby
- Frosting: We use Betty Crocker Vanilla
- Red and yellow food coloring
- Oil, water, & eggs
- Individual measuring cups
- Hand mixer or large spoon
- Two large bowls for mixing
- Baby wipes (and lots of them!)
Instructions:
- First, take your disposable tablecloths and spread them across the entire workspace. This is why I recommend up to two tablecloths. If necessary, I tape them together so they can fit across my kitchen island.
- Have your child place one baking cup into each cupcake pan cup.
- Preheat the oven and gather all ingredients to make the cupcake batter. Follow the instructions on the package.
To fully allow my kids to get involved in this stage, I let them take turns pouring everything into the large bowl. Measuring cups help with preciseness and are also easier for little hands to manage. I pour the liquids for accurate measurements and hand them the measuring cup, which they pour into the bowl.
- Once the batter is mixed and complete, I take all of the batter and place it inside a freezer bag. Once all batter has been added to the bag, ensure the bag lock/zipper at the top is closed securely. Then push the batter towards the bottom of the bag. Cut a small tip into one of the bottom corners of the bag.
Tip: if you have more than one child participating, you can split the batter into two bags so that they each have their own to work with.
- Have your child squeeze a little bit of the cupcake batter into each of the cupcake baking cups inside the cupcake pan using the freezer bag. The bag should be easy for them to squeeze out and maneuver.
- Once all baking cups are filled halfway, the adult should place them in the oven. Bake as directed on the package.
- While the cupcakes are baking, get your second large bowl and pour your entire container of frosting into it. Have your kiddos squeeze droplets of yellow and red food coloring into the bowl (12 drops of yellow and four drops of red). Let your kids stir. Then you can complete the stirring to ensure the color is thoroughly blended.
- Follow the instructions from step four on adding all contents into a storage bag.


- Once cupcakes are ready and have completely cooled off, grab your frosting bag and allow your child to squeeze frosting on top of each of the cupcakes. If you need to, you can use a butter knife or spoon to smooth it over, or just let it be wild and crazy to match whatever pattern they squeeze on top.
- Take an empty paper baking cup and pour some large sprinkles into it. Give to your child and allow them to top their cupcakes with the fall-themed sprinkles.
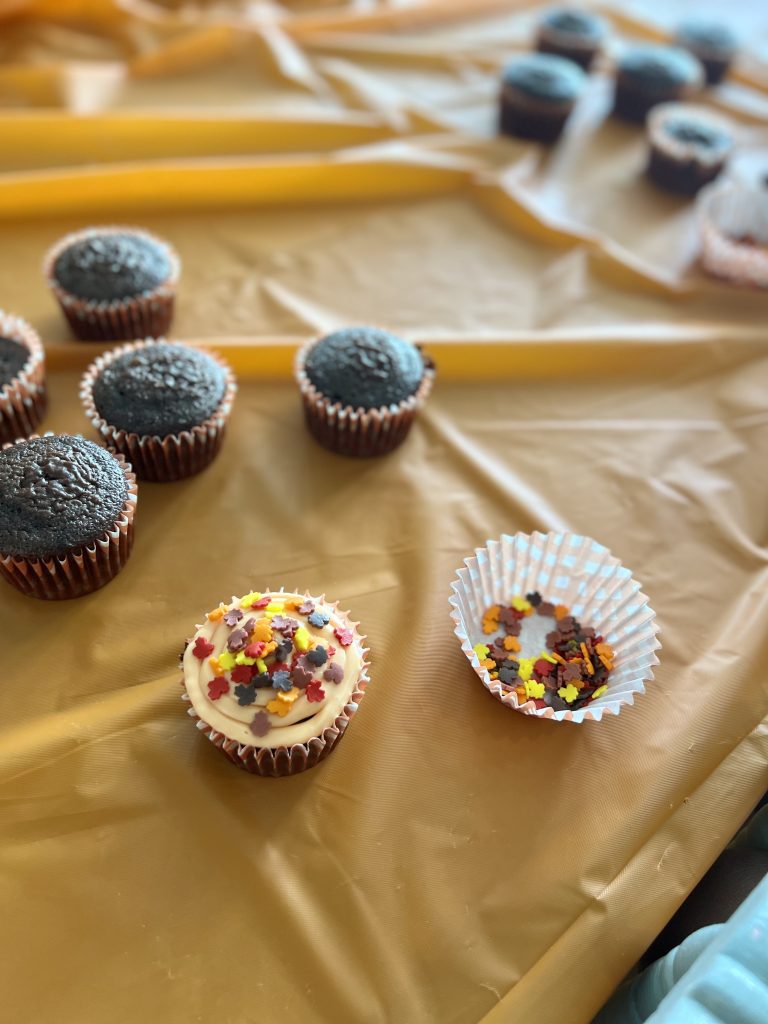
To clean up, put your few dishes into the sink, take the plastic tablecloths with all the mess, fold the mess inside, and dump it into the trash can!
Mess-Free Fall Leaf Painting
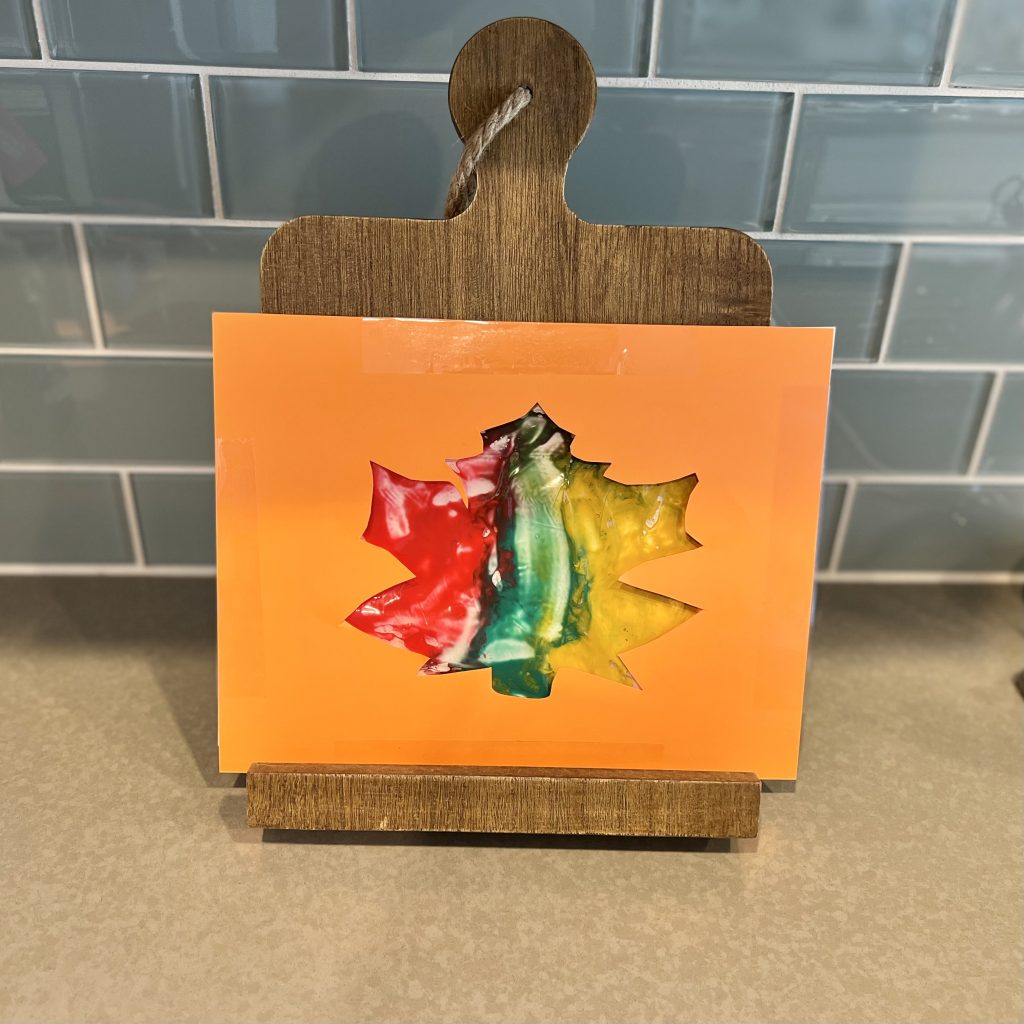
Here’s a simple and fun way to do some fall painting without getting paint all over your house. My kids love this craft on a rainy day or a lazy Saturday.
What You’ll Need: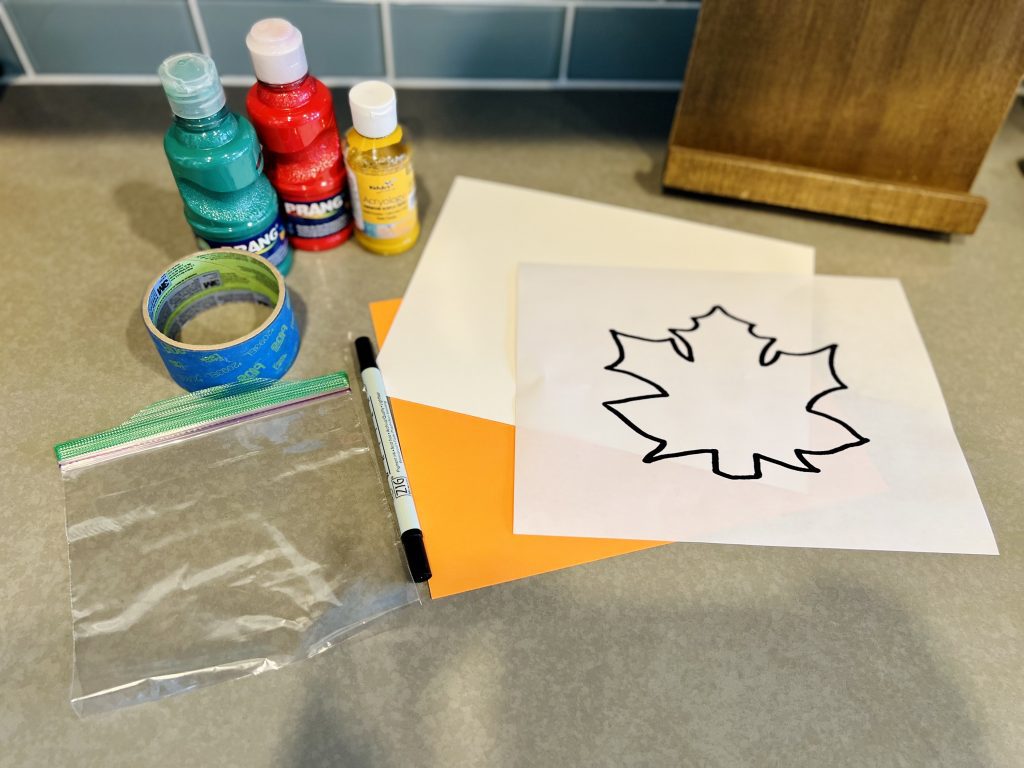
- White cardstock
- Brown or orange cardstock
- Sandwich bags with a zipper or lock
- Clear packaging tape
- 3-4 fall paint colors (I recommend yellow, brown, red, and green)
- 1 sheet of printer paper for your stencil
Instructions:
- Start with a leaf template that’s no bigger than your sandwich bag. You can pull free clipart online, use a natural leaf from outside, or one of these I printed from Kids Craft Room. Print the leaf, then cut it out so it can be used as your stencil.
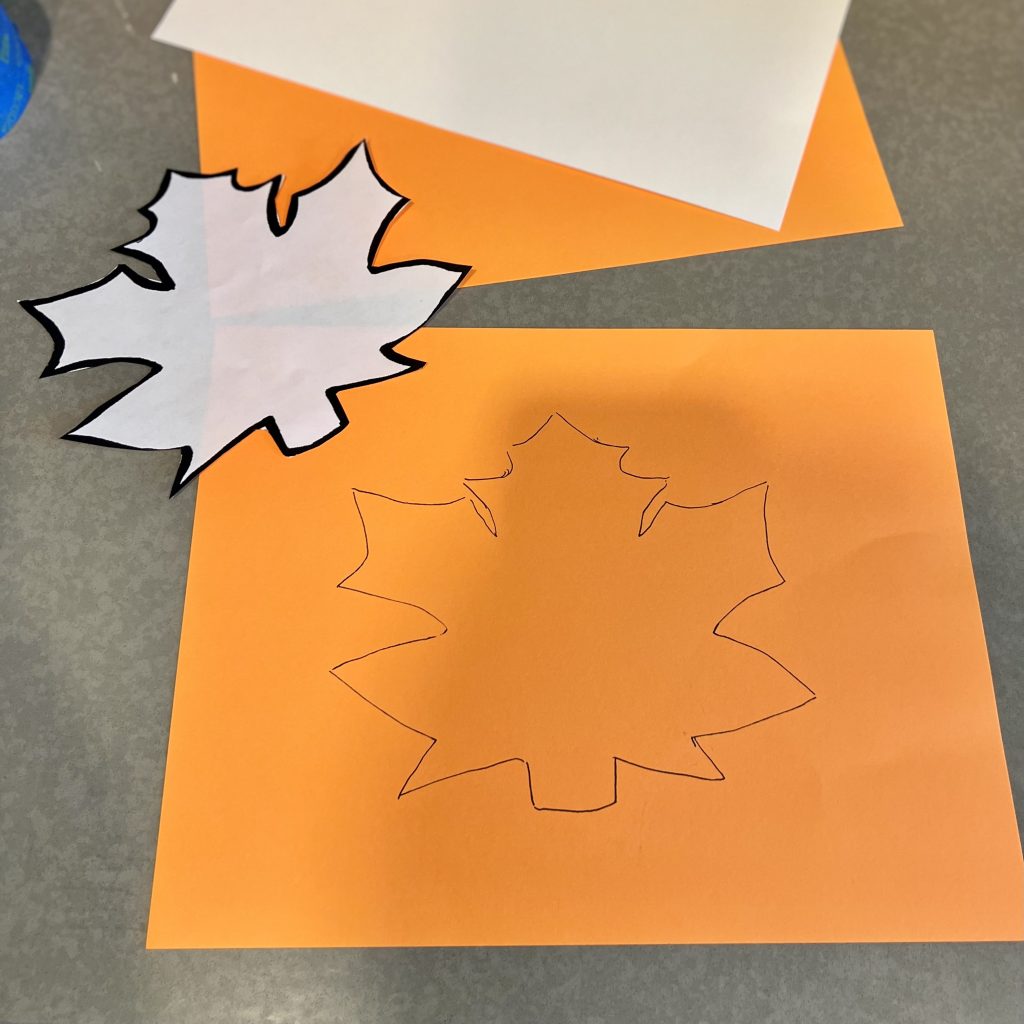
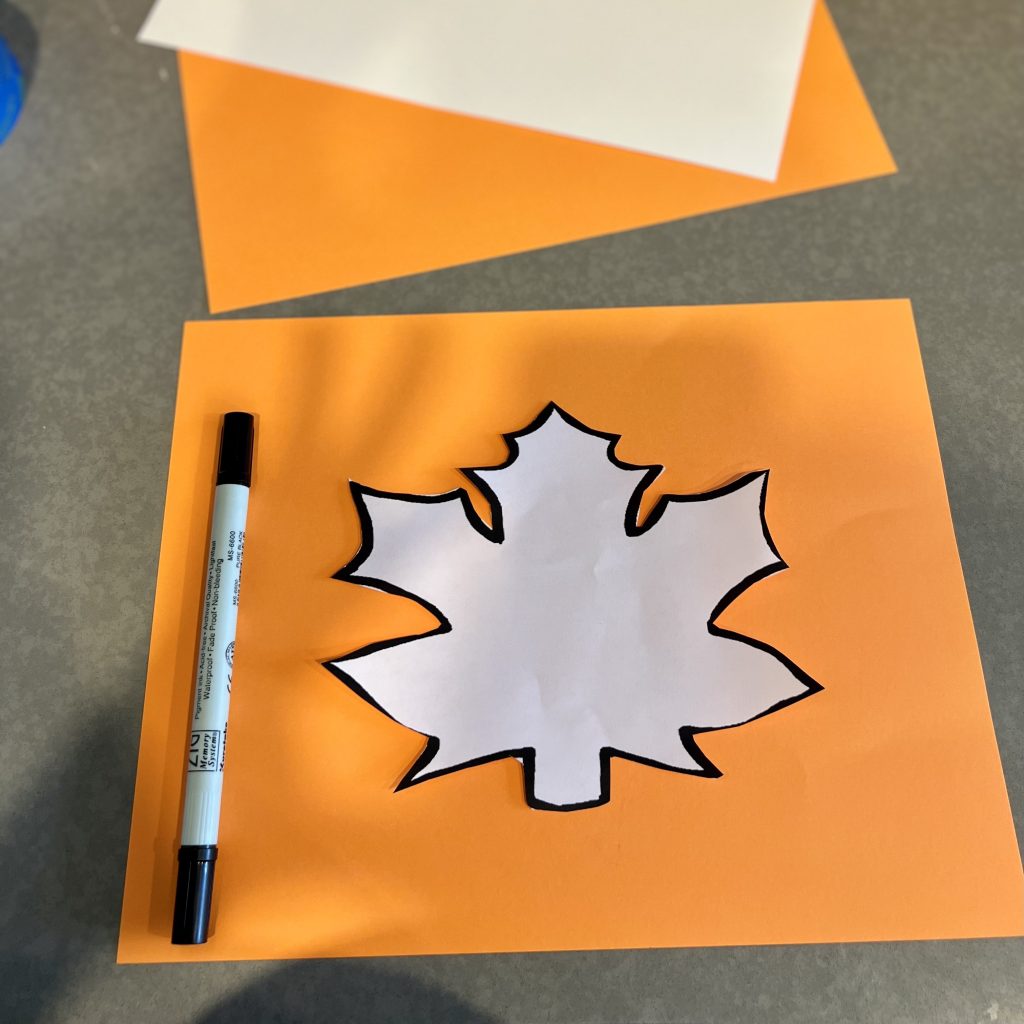
- Trace the leaf onto the brown or orange card stock and cut it out.
- Place one large dot of each paint color inside the sandwich bag. Then close the bag, ensuring you let all the air out.

- Use the clear packaging tape to tape the top part and then the outer seamed sides of the bag onto the white construction paper. I would also recommend a little tape on the backside of the bag so that it sticks in the middle.
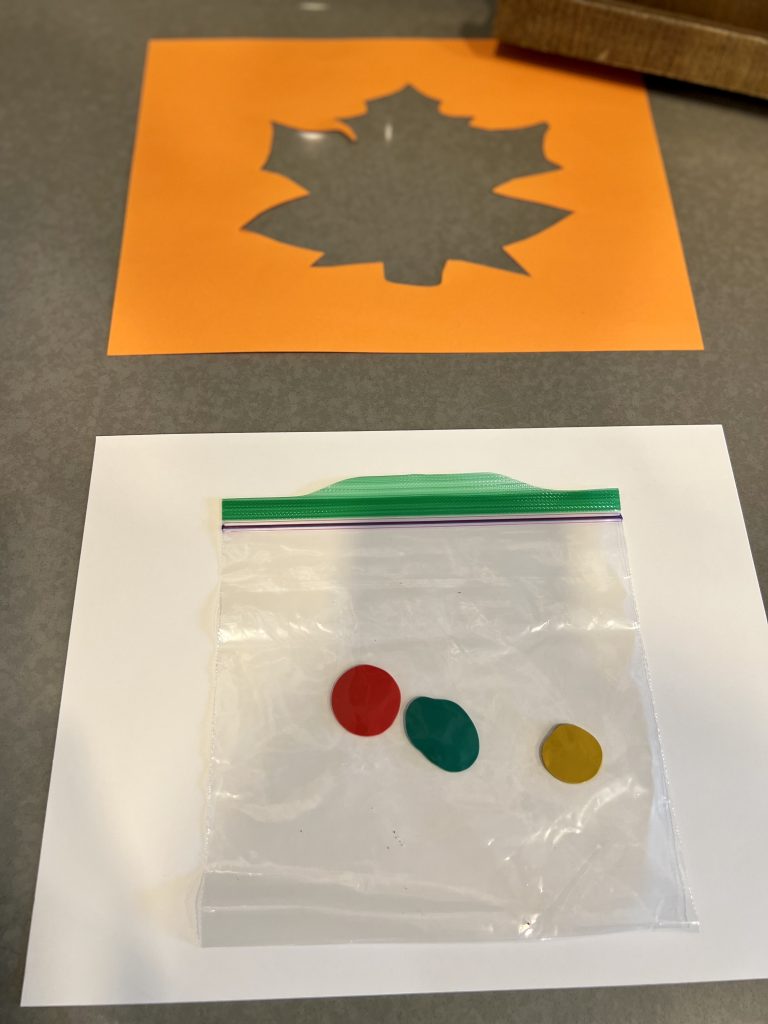
- Place the brown or orange card stock with the cutout shape on top. Then tape all four sides with the packaging tape.
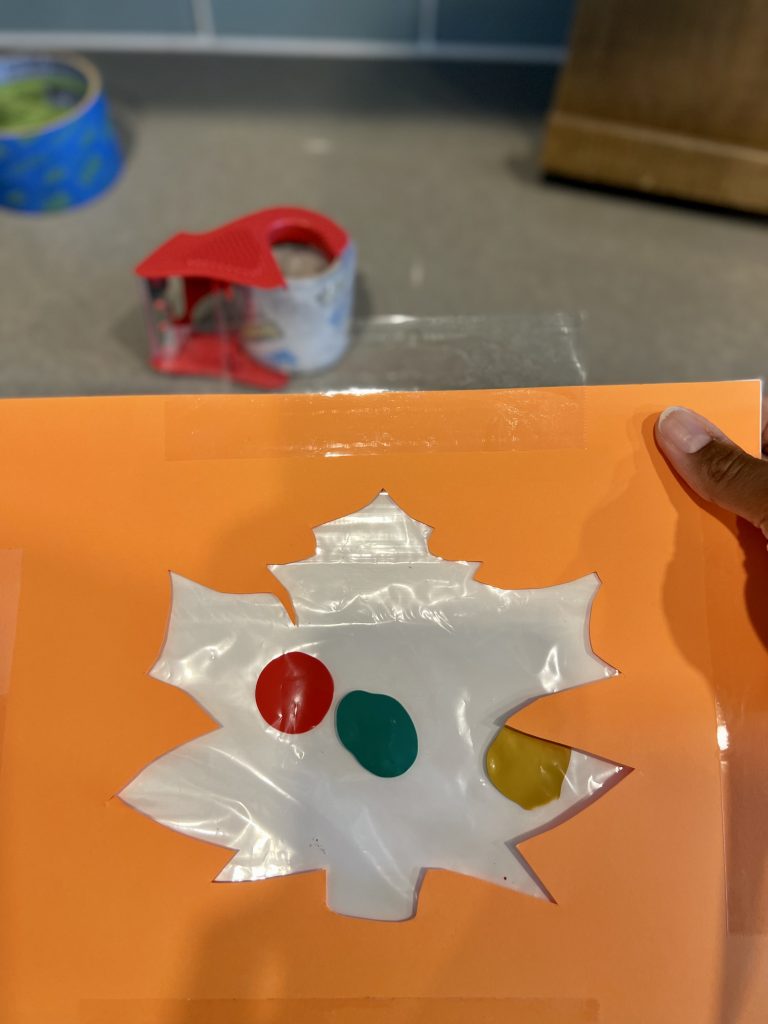
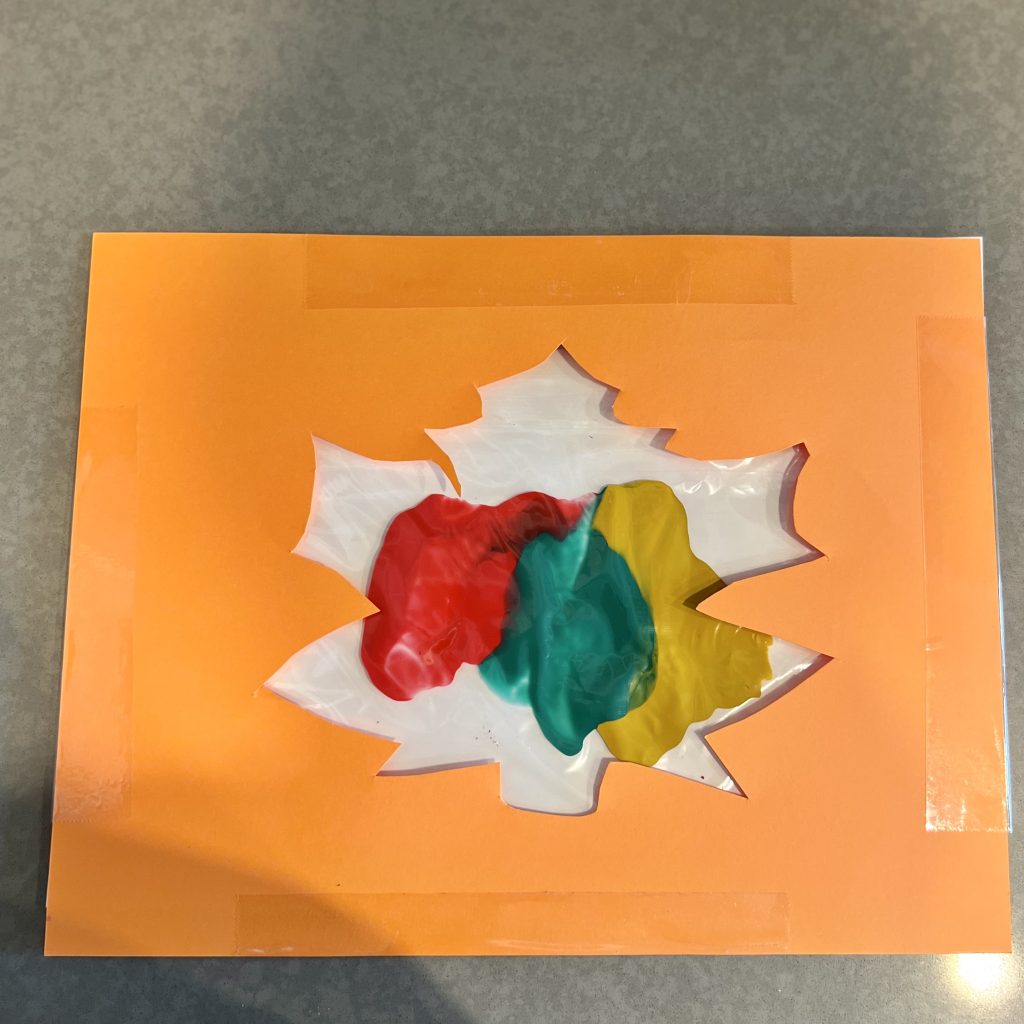
Allow your child to enjoy mess-free “painting!”
Pumpkin Puzzles
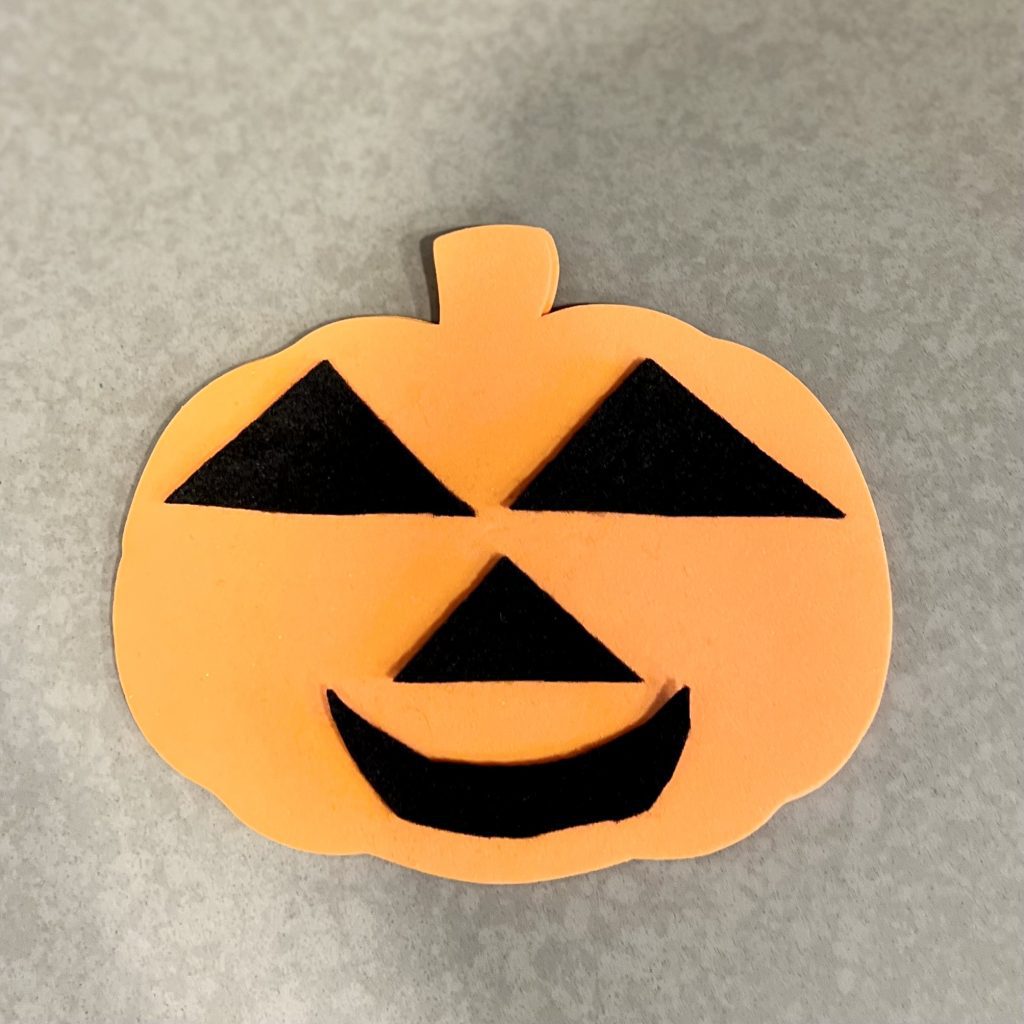
Fall is the perfect time to decorate pumpkins! Here’s an easy and mess-free way to do it “toddler-style.”
What You’ll Need:
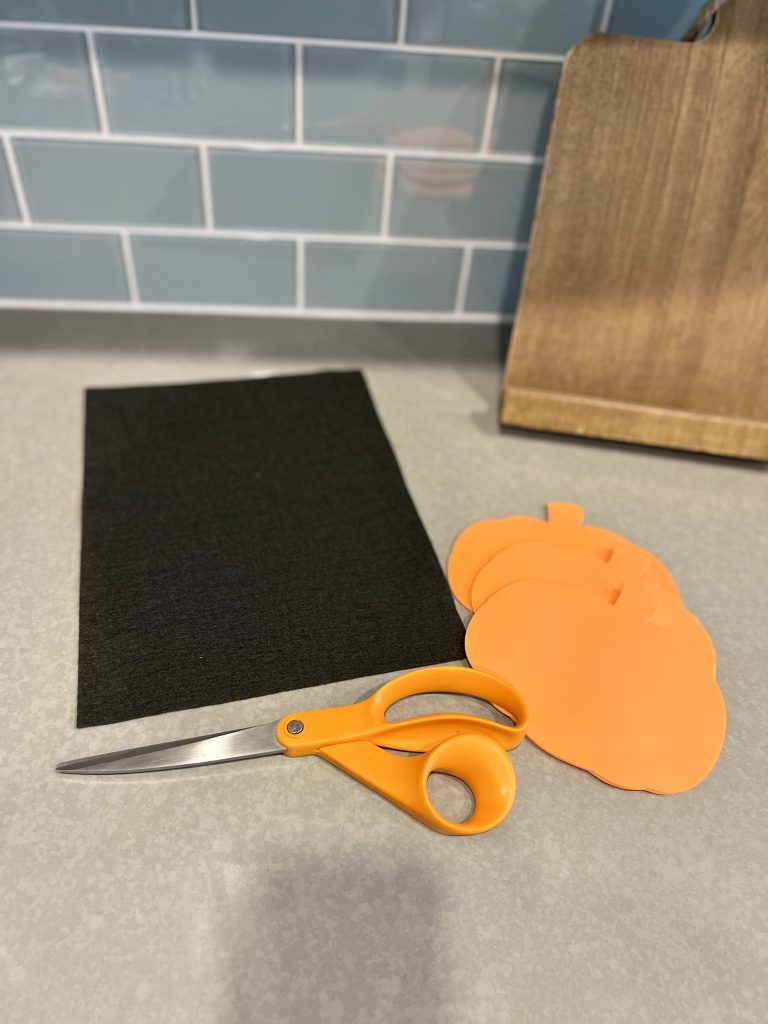
- Foam pumpkins you can get a pack at Hobby Lobby or another craft store.
- One sheet of black felt
- Scissors
Instructions:
- Take your black felt and cut out several shapes: triangles, crescents, and other shapes that would make a great pair of eyes, mouth, and nose for the pumpkin.
- Set the black felt pieces on the table next to the foam pumpkin, and let your toddler design their favorite pumpkin face.
- You can ask your toddler what to name their pumpkin, show you where the eyes, nose, and mouth are, etc.
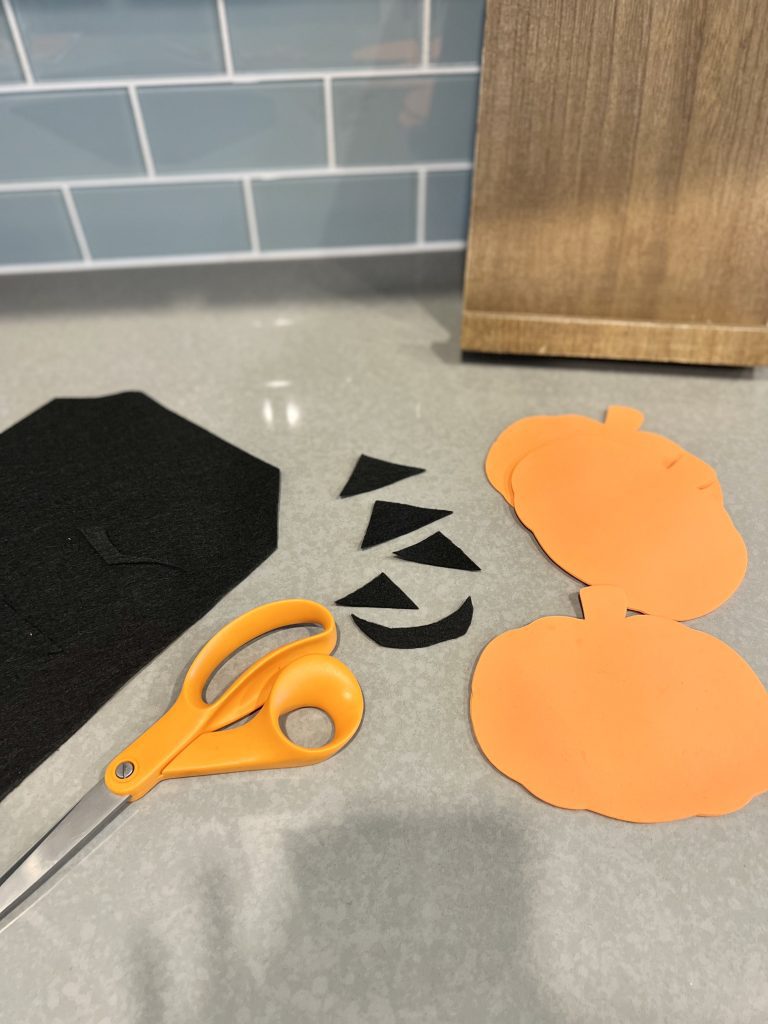
Tip: If you want to make a face more permanent, you can get some double-sided tape or glue and adhere them to the pumpkin, but to keep it mess-free and something they can do more than once, I like to treat the pieces more like “puzzle” pieces. Store them all in a sandwich bag so you can pull them out again on a different day.


